The Lego Star Destroyer Project
(Fact #5: You get a "to scale" Rebel Blockade Runner with it! Free!)
| Repeat Steps 1 - 19: | |
| Now, I'm thinking that today's journal entry will be a very short one:
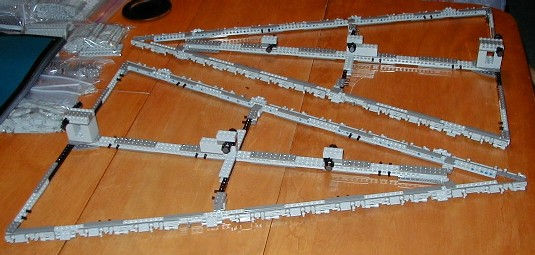
See "Day One" and "Day Two". Getting the second frame put together should be quick and I should be able
to get it finished in one day. Sure, that's a boring journal entry, but it's a boring part of the project! Boy, was I wrong! I'm still counting out the pieces and slapping them together, pausing from time to time to closely compare the frame-in-progress with its diagram in the book. Eventually, there are two frames.
| |
 | |
| Step 20, which I was so looking forward to completing yesterday, involves making the blocks that will connect the two frames. Ten connectors to build and then I can attach the frames together. There are also two other magnets that are added to one of the frames. The way the diagram shows it, the magnets are attached to the bottom frame. 'Okay', I say to myself, 'that is how I tell which side is the top and which is the bottom: the bottom has two more magnets than the top'. | |
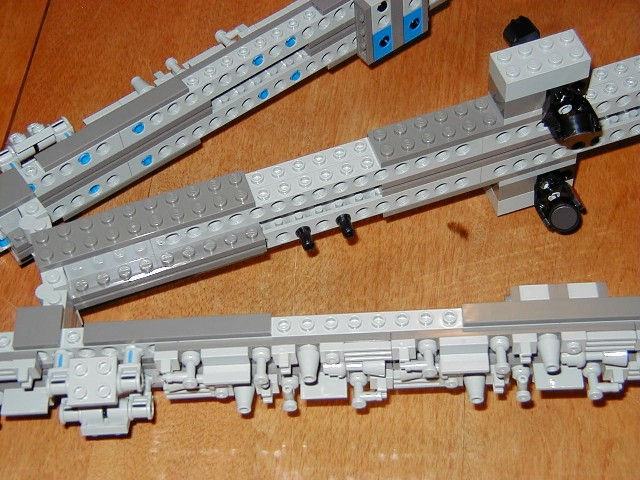 The connector blocks are constructed with gray blocks on one side and blue ones on the other. I decide to keep it consistent and mount all the connectors with the gray sides up. The blue side hangs over a bit on the bottom, but I think nothing of it. As I'm putting on the connectors I find a place where I failed to attach four needed pegs. See? Told this would happen, didn't I? Somehow, during my pain-staking counting of all the parts I failed to pull and attach four pegs. There are not four extra pegs just sitting around on the table, so I must have failed to pull them - I hope. Okay, four more pegs and I finish putting on all the connectors. As I'm mounting the two frames, I jump the gun and assume that all the pegs inside the frames are meant to be used for connectors. I come up two short. Back to the manual and I find that there are two sets of pegs in the center of the frame that don't need my spiffy new connectors on them. They are there for the Star Destroyer's "legs". That's what I get for thinking for myself - I get to back up and fix my mistakes.
| |
| After this mistake, I review the diagram a bit more and see that all ten connectors
are shown with the blue blocks up. Being that I know which side is up, I realize that my decision to go gray side up
was another goof. Damn! All ten of the connectors get pulled off and turned over before I quit for the night.
| |
 The frame connectors are blue side up, now. I turned them all over.
| |
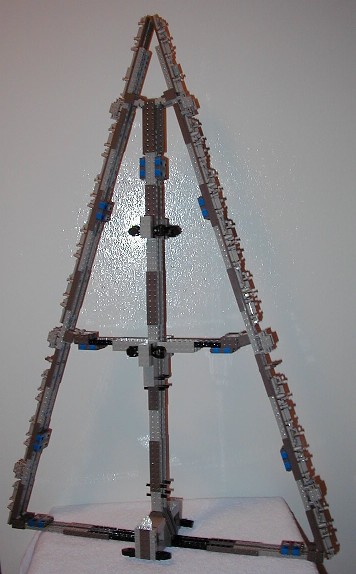 Sing it with me: O' techno Christmas tree, o' techno Christmas tree... | |
| ...Day Two | Day Four... |
![]()